Some time ago I was asked to make a step by step on how I paint my yellow-grey marines. Below you can see how I made their armour parts. Also took photos from painting face but I'll post them in few days.
sry for the pics, there are a few out of focus...
grey:
the first step was to paint everything with some medium grey (space wolves grey + chaos black)
 I made some highlights using few layers of lighter mix of SW grey and black, up to pure SW. Then I made some deeper shadows, using more black.
 the next step was to make it look more smooth. I used glazes using some previously mixed paints.
 when it was smooth enouch I painted edges of the armour with SW grey+ some skull white
 Made some ice blue glazes to make it more interesting, pure grey was boring in my opinion.
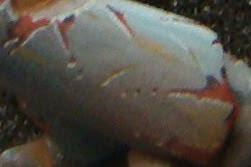
 Then I started to paint battle damage. I mixed blood red, chaos black and bestial brown for the base color of scratches.
 then, with pure black I painted all the upper edges of battle damage.
 and with skull white+some SW grey all the bottom edges. It then looked more 3D and real:)
 With watared down snakebite leather I made some dirt and stains.
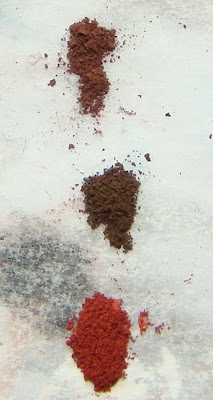
 Then I prepared some dry pastels- light and dark brown and some rusty red.
 starting with dark brown I put on some pastels with old and big brush (size 3). Then the same with light brown and finally red.
 I mixed some snakebite leather and chaos black and painted few lines (those will be shallow scrathes)
 and gently highlighted them with some light grey;)
 That's all for grey;]
yellow (or beige?:P )
First a basecoat of bleached bone
 made some shadows using layers of bleached bone + snakebite leather, up to pure snakebite.
 then, with glazing with some mid colors I smoothed it (it's basicly the same as grey but with different colors...)
 Higlighted it with skull white and bleached bone mix
 Then using the same method as in grey I painted battle damage.
 Did some stains using watered down bestial brown
 and also same as in grey I put on dry pastels.
 and thats all for now:)
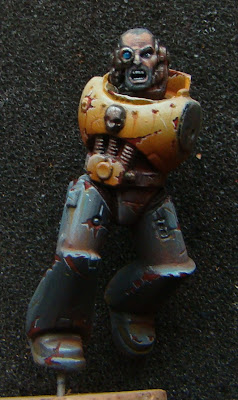
here you can see how this guy looks right now.
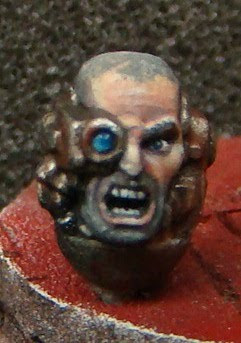
 and a close up of face. As I said I'll post another step by step showing how I painted it.
 hope you like it!
cheers!
loler

Niewyobrażalnie fantastyczne. Zęby na marines? Odlot, nie wierzę w lupię, więc po prostu masz opanowany pędzel do granic wytrzymałości. Będzie wyglądał epicko!
ReplyDeleteThis is one of the most awesome step by steps I've seen.
ReplyDeleteOne suggestion: the pastel bits are difficult to see and describe you may want an article just on that topic (soz if u have already :p)
Well done *pat on the back +1*
Great! I'm just going to paint my BA this way and here you come with this tutorial :) Thanks!
ReplyDeleteThx guys, happy you like it.
ReplyDeleteRuss, I could make one someday... but right now I don't know when... quite a lot to do, and not much free time. But I'll think about it.
here I took some more photos about it---> http://thebrushbrothers.blogspot.com/2010/05/battle-damage-tutorial.html
cheers!
Incredible tutorial. Fantastic.
ReplyDeleteDid you use the retarder liquid you showed in a past tutorial to blend the colours or only water?
Now if anyhow you could manage to show us the paint dilution and how you give each layer on the mini , perhaps we could make it a little closer to your level..xD
Thinking about my previous comment, I have thought:
ReplyDeleteWhat we really would need are little technique videos, about 2 or 3 minutes, not more, with good light filming you as you take the paint, dilute it (to see the famous "milk consistency") and how you apply each glaze layer in a place.
I think that is the most demanded explanation about painting all over the net (as pics based tutorials are all around).
Thanks anyway and keep on showing your minis.
Hi
ReplyDeleteThat's a really good idea for tutorial. And yes, would be much better if it was a movie. The problem is that I don't have camera;/
I will ask some people though, mayby someone will lend me...;)
"Did you use the retarder liquid you showed in a past tutorial to blend the colours or only water?"
If you mean wet blending tutorial then it wasn't me who made it, but Redav;). Here I haven't used any retarder, only water.